I had two “practice” glam girl blocks left over from my wall hanging and decided to make some mini pillows. What do you think? The smaller pillow has a marabou door hanger for an extra bit of glamour! For the larger mini pillow, I trimmed the left side and the right side so there is 1/2 inch of white fabric on each side. Then I added 3/4 inch of white fabric to the top of the block and to the bottom of the block.
Next I added a two inch pink border to both sides and then the top and bottom.
Then I made a quilt sandwich: muslin on the bottom, batting in the middle and the quilt block on top. I am practicing my machine quilting skills and am getting braver with each attempt! I meandered around the white fabric and used a decorative loop stitch on the left and right pink borders.
Then I decided it needed rick rack. You could personalize or embellish this block by adding machine embroidery. I wish I thought about this before I sewed my pillows together! 
Finally, with right sides together, I sewed the quilt block to a cute backing fabric (using a 1/2 inch seam allowance) and leaving a 3 inch space to turn the pillow inside out. Clip your corners and stuff your pillow. Slip stitch the opening closed. 
Cuteness plus!
On to the door hanger!
I trimmed the block so there is a 1 inch white border on the left and right sides of the block. I added a 1 1/4 inch strip of white fabric to the top and to the bottom.
Like the pillow above, I quilted the block and added rick rack. Add some machine embroidery to personalize your door hanger! 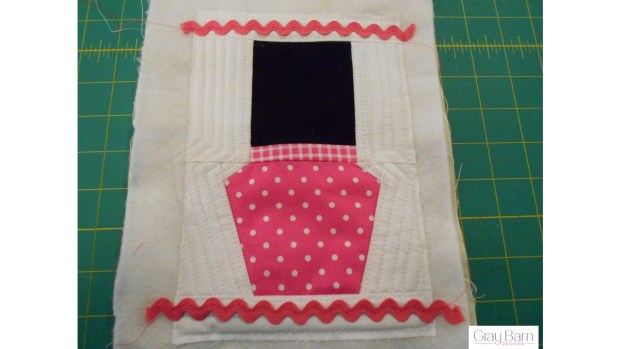
Pin your marabou 1 inch from the corners of your quilted block.
Pin your pillow backing fabric to the quilt block and marabou, right sides facing each other. Use a 1/2 inch seam allowance and sew around the outside of your door hanger, leaving a 3 inch opening at the bottom. I reinforced the stitches at the opening.
The top of your door hanger will look like this. Trim off the extra marabou and clip your corners on the diagonal (making sure you don’t cut your stitches).
Turn your door hanger right side out and stuff. Slip stitch the opening closed. Since I don’t have an embroidery machine, I added some wording with my computer so you can see the possibilities!
Leftovers can be fast and fun! These are small little projects that have a big cuteness impact! Plus I got to continue practicing my machine quilting skills!
Send us pictures of your mini pillow projects, we would love to see how you personalize your little minis!

![IMG_1163[1]](https://i0.wp.com/graybarndesigns.com/wp-content/uploads/2016/02/img_11631.jpg?resize=620%2C827&ssl=1) Cindy has done me a solid. She made a handy-dandy grid for my Roly Poly Teddy quilt that will help you lay out the rich and luxurious brown and gold teddy squares we gathered earlier. Then she went one step farther and exploded the Teddy the grid so you can see how to pull the teddy rows together.
Cindy has done me a solid. She made a handy-dandy grid for my Roly Poly Teddy quilt that will help you lay out the rich and luxurious brown and gold teddy squares we gathered earlier. Then she went one step farther and exploded the Teddy the grid so you can see how to pull the teddy rows together.![IMG_1082[1]](https://i0.wp.com/graybarndesigns.com/wp-content/uploads/2016/01/img_10821.jpg?resize=620%2C827&ssl=1)
![IMG_1337[1]](https://i0.wp.com/graybarndesigns.com/wp-content/uploads/2016/02/img_13371.jpg?resize=620%2C827&ssl=1)
![IMG_1082[1]](https://i0.wp.com/graybarndesigns.com/wp-content/uploads/2016/01/img_108211.jpg?resize=292%2C390&ssl=1)
![IMG_1082[1]](https://i0.wp.com/graybarndesigns.com/wp-content/uploads/2016/01/img_108211.jpg?resize=347%2C463&ssl=1)
![IMG_1085[1]](https://i0.wp.com/graybarndesigns.com/wp-content/uploads/2016/01/img_10851.jpg?resize=620%2C827&ssl=1)
![IMG_1088[1]](https://i0.wp.com/graybarndesigns.com/wp-content/uploads/2016/01/img_10881.jpg?resize=620%2C827&ssl=1)
