
I remember growing up and loving the sun and the heat of the summer. The farm sits on the top of a hill and the house is positioned just under the crest of the hill. The breeze on that hill is fantastic in the summer (we’ll leave a discussion about the winter ‘breeze’ for another time).
Since I was the toughest, it was my job to be in the hay mow stacking bales when we were making hay. That mow was dark, stuffy, and unbearably hot as the sun beat down on the barn’s tin roof. Small pieces of loose chaff would hang and dance in the air. It would take us about half an hour to unload and stack a load of hay. When we were finished, stepping outside and catching that fresh breeze was heavenly. It would wick the sweat right off my arms and lift the fine hair off the back of my neck.
As you may recall, I have three sisters. The job for Cindy and our oldest sister was to unload the wagon and send the bales up the elevator to the mow. Where was the youngest sister you might ask? Well — it was her job to sit by the switch that ran one (but not both) of the elevators and write poetry while we worked. I’m serious. While I was sweating like a farm hand and trying to work as hard as my dad, while my other sisters were extricating 50 lb bales from the Jenga jumble of bales on the wagon, little sister was at the ready in case the elevators needed to be turned off. Writing poetry. This arrangement is the basis of many possible years of therapy.
My mother hated the heat then and she still does. Her frequent refrain in the summer was “stinking, rotten hot”. As we grew older the phrase became “friggin hot”. We used to laugh when she said it, because we couldn’t understand that it truly could be too hot. One time when my son was about 2 years old we were driving back from Buffalo and I heard this sweet little voice declare “it’s so friggin hot back here”. It was about that time that I decided that he was spending just a little bit too much time with Grandma!
Although I haven’t been in that hot hay mow for 14 years, I can still smell it, hear it and feel it. This heat wave reminds me of it and the blessings bestowed by that hard work.
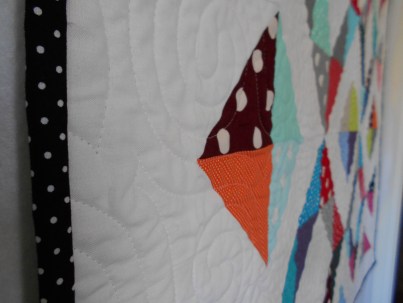
Tonight, stripped down to my skivvies (no pictures, I promise), in a morass of stinking, rotten heat, I ironed this project just so I could get an opinion on what do do with it. I made this baby wall hanging with a farm fat quarter bundle that I bought some time ago. I added the Holstein print and the blue jean blocks and sewed it up quick. Then I hated it. I was going to gift it to my sister’s friend who had a baby, but I hated it so much that I pretended that it was never finished. The baby is at least two now and I feel so guilty. It’s been floating along in my sewing closet for a while and now it needs to get finished or get gone.
What do you think? Is there a fix (for the baby quilt, not the heat)?
![IMG_1642[1]](https://i0.wp.com/graybarndesigns.com/wp-content/uploads/2016/06/img_16421.jpg?w=203&h=270&ssl=1 "IMG_1642[1]")
![IMG_1643[1]](https://i0.wp.com/graybarndesigns.com/wp-content/uploads/2016/06/img_16431.jpg?w=203&h=270&ssl=1 "IMG_1643[1]")


![IMG_1163[1]](https://i0.wp.com/graybarndesigns.com/wp-content/uploads/2016/02/img_11631.jpg?resize=620%2C827&ssl=1) Cindy has done me a solid. She made a handy-dandy
Cindy has done me a solid. She made a handy-dandy ![IMG_1082[1]](https://i0.wp.com/graybarndesigns.com/wp-content/uploads/2016/01/img_10821.jpg?resize=620%2C827&ssl=1)
![IMG_1337[1]](https://i0.wp.com/graybarndesigns.com/wp-content/uploads/2016/02/img_13371.jpg?resize=620%2C827&ssl=1)