Paper Piecing Sew Along – Day 3

Need a cute Christmas stocking block?  You can stop your search, Sandy has cornered the Christmas stocking cuteness block.

Branded Stocking facing right

We know some people like their Christmas stockings to face  right and others like them to face left.  That’s why Sandy created a pattern for each!


face right brand

These two patterns are super easy and a great way to practice  your paper piecing skills.  Click on the links below and get ready for maximum cuteness!

stocking_pp_toe face right

stocking_pp_toe face left


Left Over Monday Glam Girl Mini Pillows

I had two “practice” glam girl blocks left over from my wall hanging and decided to make some mini pillows.  What do you think?  The smaller pillow has a marabou door hanger for an extra bit of glamour!Slide1For the larger mini pillow, I trimmed the left side and the right side so there is 1/2 inch of white fabric on each side.  Then I added 3/4 inch of white fabric to the top of the block and to the bottom of the block. Slide2

Next I added a two inch pink border to both sides and then the top and bottom.

Then I made a quilt sandwich: muslin on the bottom, batting in the middle and the quilt block on top.  I am practicing my machine quilting skills and am getting braver with each attempt!  I meandered around the white fabric and used a decorative loop stitch on the left and right pink borders.

Then I decided it needed rick rack.  You could personalize or embellish this block by adding machine embroidery.  I wish I thought about this before I sewed my pillows together!  Slide16

Finally, with right sides together, I sewed the quilt block to a cute backing fabric (using a 1/2 inch seam allowance) and leaving a 3 inch space to turn the pillow inside out.  Clip your corners and stuff your pillow.  Slip stitch the opening closed.  Slide12

Cuteness plus!Slide13

On to the door hanger!Slide6

I trimmed the block so there is a 1 inch white border on the left and right sides of the block.  I added a 1 1/4 inch strip of white fabric to the top and to the bottom.

Like the pillow above, I quilted the block and added rick rack.  Add some machine embroidery to personalize your door hanger!  Slide5

Pin your marabou 1 inch from the corners of your quilted block.Slide7

Pin your pillow backing fabric to the quilt block and marabou, right sides facing each other.  Use a 1/2 inch seam allowance and sew around the outside of your door hanger, leaving a 3 inch opening at the bottom. I reinforced the stitches at the opening.Slide10

The top of your door hanger will look like this.  Trim off the extra marabou and clip your corners on the diagonal (making sure you don’t cut your stitches).Slide9

Turn your door hanger right side out and stuff.  Slip stitch the opening closed.  Since I don’t have an embroidery machine, I added some wording with my computer so you can see the possibilities!Slide11

Leftovers can be fast and fun!  These are small little projects that have a big cuteness impact!  Plus I got to continue practicing my machine quilting skills!

Send us pictures of your mini pillow projects, we would love to see how you personalize your little minis! Slide1

Glam Girl Wall Hanging

Today we are going to make our Glam Girl Wall Hanging!

**GET THE FREE PATTERN HERE**

Slide1

General Information:

  • Finished size is 15 1/2 inches x 31 1/2 inches
  • Blocks have been squared to 7.5 inches
  • All seam allowances are 1/4 inch
  • Assume all fabrics are 42 inches wide, especially for the width of fabric cuts

What you will need:
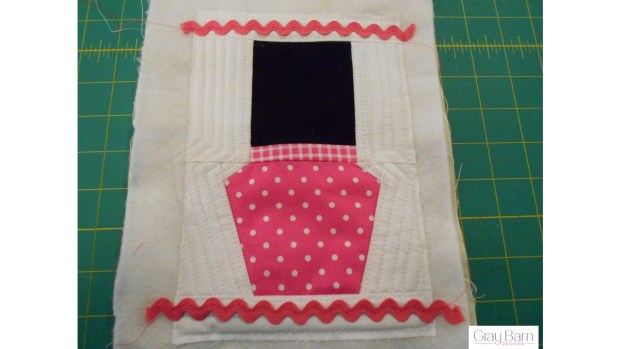
*Three Glam Girl Blocks (I squared my blocks to 7.5 inches because one had stretched a lot during piecing)

¼ yard of Hot Pink Fabric for sashing between block and inner border

½ yard of Pink and Yellow floral fabric for outer border and binding.  I used Windham Fabrics “Mariposa” by Another Point of View;  Pattern No. 40088.

½ yard of backing fabric

½ yard of batting

Fabric for the hanging sleeve

Cutting Instructions

For the Hot Pink Sashing Between Blocks:
Cut 4 strips that measure 1 ½ inches x 7.5 inches.

For the Hot Pink Inner Border:
Cut 2 strips that measure 1 ½ inches x 25.5 inches

For the Pink and Yellow Floral Outer Border
Cut 3 strips that measure 3 ½ inches x Width of Fabric (also known as WOF)
• Take one 3 ½ inch strip and cut two rectangles that measure 3 ½ x 9 ½ inches each.
• Take one 3 ½ inch strip and cut it to measure 32 inches long
• Take the remaining 3 ½ inch strip and cut it to measure 32 inches long

For the Pink and Yellow Floral Binding
Cut 3 strips that measure 2 ¼ x Width of Fabric

Let’s Start Sewing!
1. Sew the hot pink sashing strips to your glam girl blocks as shown below. Press seams toward the hot pink fabric. Your wall hanging will look like this:

Slide2

2. Sew one hot pink inner border strip to the left side of your wall hanging and sew one hot pink inner border strip to the right side of your wall hanging. Press seams toward the hot pink fabric. Your wall hanging should look like this:

Slide1

3. Sew one 3 ½ inch x 9 ½ inch rectangle to the top of the wall hanging. Next, sew one 3 ½ inch x 9 ½ inch rectangle to the bottom of the wall hanging. Press seams toward the hot pink fabric. This is coming together nicely! Does yours look like this?

Slide1

4. Sew one 3 ½ inch x 32 inch strip to the left side of your wall hanging. Next, sew one 3 ½ inch x 32 inch strip to the right side of your wall hanging. Wow! The piecing is done!

Slide1

5. Quilt your wall hanging using your favorite quilting technique! I started on mine by stitching in the ditch of my seams. Then I decided to outline my seams with a straight stitch.Slide6

6. I got a little braver and sewed some gentle waves. THEN I got really crazy and sewed a decorative zig zag stitch around the hot pink inner border.

Slide4

AND I went overboard crazy and outline quilted around all three blocks!

Slide10

I grew even more daring and quilted in different stitch widths and directions…it looks great if I do say do myself!

Slide8

7. Once I finished my machine quilting, I added a sleeve to the back of the wall hanging before I added the binding.  Click here to learn how:  Hanging Sleeve Tutorial

8. Next, make the binding for your quilt and attach it. This Craftsy tutorial shows you how to do it:  Binding Tutorial

9. Your Glam Girl wall hanging is now complete!  I hope you enjoyed sewing along with us!

Slide11

Glam Girl Block #3

The last block for our Glam Girl Wall Hanging is the cutest paper pieced block on the entire planet!  When Sandy created this block, I knew it would be a big hit – don’t you just LOVE it?

Click on this link to download a free paper piecing pattern:Glam Girl Nail Polish Bottle

Slide1

As with the lipstick and lotion blocks, the sky is the limit on color choices but I decided to continue with my pink theme.  I had lots of pink polka dot fabric in my stash and I like the small white polka dots next to the larger white polka dots.  I found a little scrap of pink plaid fabric so I used it for the rim around the black cap.

Next week we will complete a wall hanging from the three Glam Girl blocks we’ve made so far.  This wall hanging is just so glamorous, I can’t wait to show you!  You will be finished in no time!

If this block inspires you to learn paper piecing, here is a good tutorial to get you started:Paper Piecing Tutorial

Slide4

See you next week!